Web3 Platform Swagger UI
Available for Premium users only.
Introduction
The Web3 API Platform Swagger UI offers developers direct, structured access to their Web3 API account through an interactive API documentation interface — bypassing the standard dashboard UI. Built on the OpenAPI (Swagger) (opens in a new tab) standard, it provides a familiar experience for those already accustomed to testing and integrating with APIs.
With the Swagger UI, developers and advanced users can automate workflows, integrate Web3 API capabilities into scripts or backend systems, and manage their account with precision and control.
Key Features
Through the Swagger interface, you can do the following:
-
Access Account Data
- Retrieve balance, usage stats, referral rewards, and transaction history.
- View and manage your API keys and JWTs.
-
Monitor and Optimize Usage
- Track blockchain-specific usage across multiple protocols.
- Analyze interval-based metrics and top consumer stats.
-
Manage Billing and Payments
- Access invoices, Stripe or crypto payment documents.
- Subscribe, manage, or cancel bundles and recurring payments.
-
Control Notifications
- Configure and manage notification channels (email, Slack, Telegram).
- Set thresholds for alerts on balance, usage, and credit levels.
-
Configure Security and Access
- Manage 2FA setup and email bindings.
- Handle enterprise client settings and access controls.
-
Organize Teams
- Create and manage team accounts, invite members, assign roles.
This interface is ideal for users looking to streamline operations, implement custom automation, or integrate Web3 API platform features into CI/CD pipelines and backend services.
Usage
Before jumping into Swagger UI interaction, you have to go through several preparation steps that include generating an API key for Swagger access, navigating to the Swagger UI, and authorizing your Swagger UI session with the API key generated.
API key creation—>Swagger UI interaction
API key creation— your temporary passcode for Swagger interaction.Swagger UI interaction— your way around the Swagger UI (navigation, session authorization).
API key creation
To create an API Key, follow these steps:
- In Navigation, click Settings > Platform Swagger to open the corresponding pane.
- In the Web3 API Platform Swagger pane, click + Create API key, enter the basic fields, and then click Create API key:
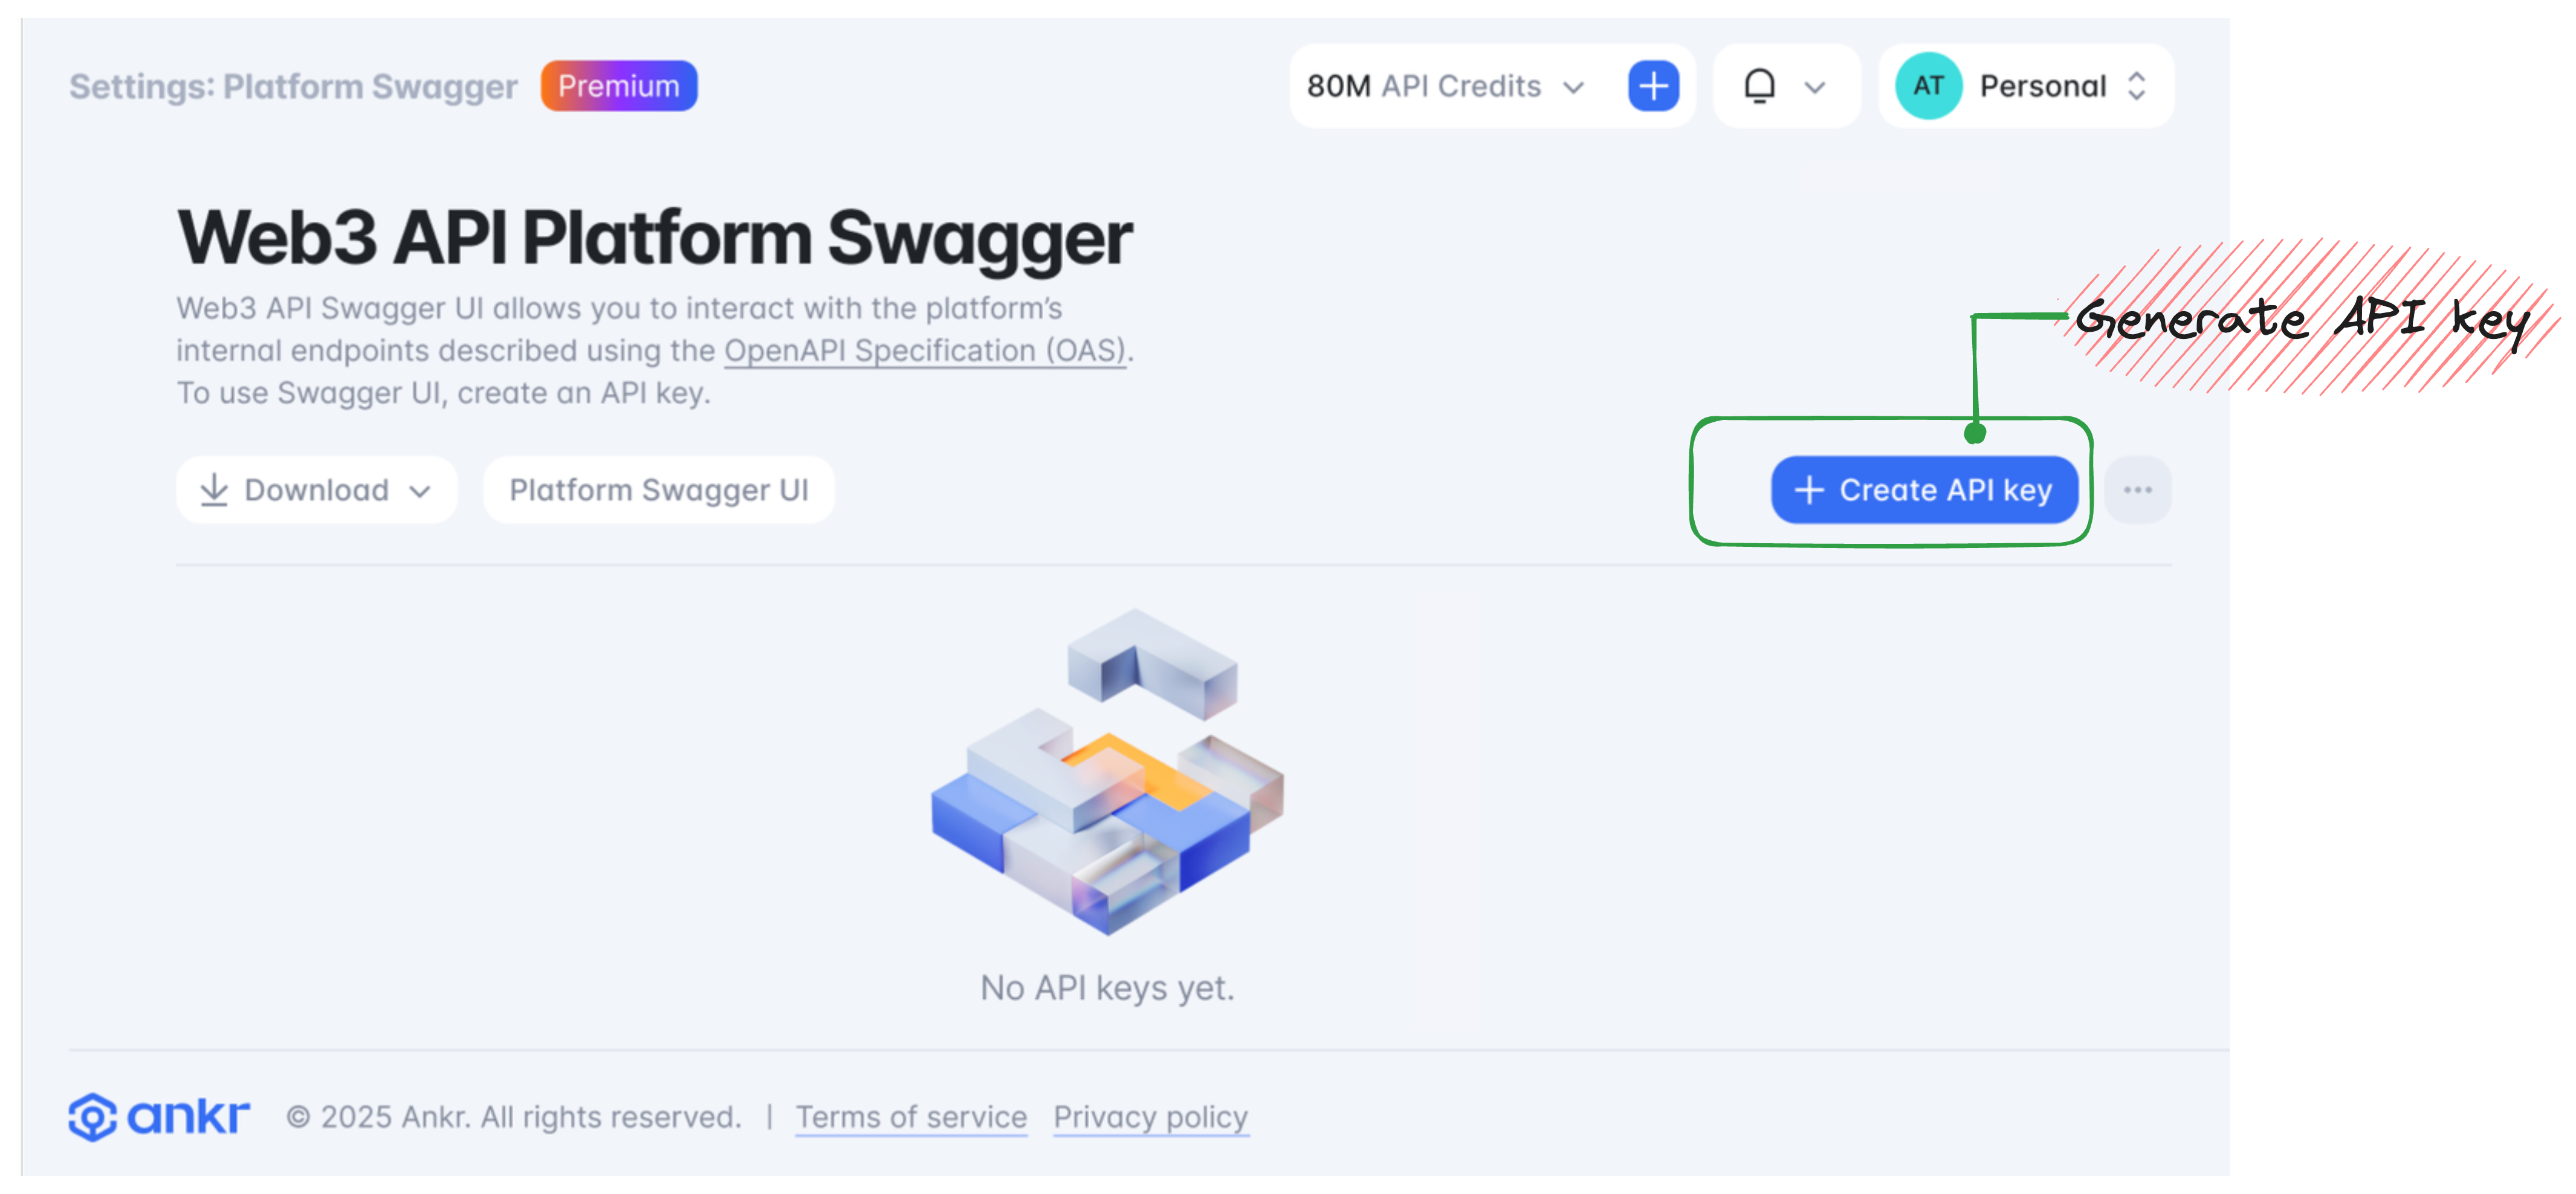
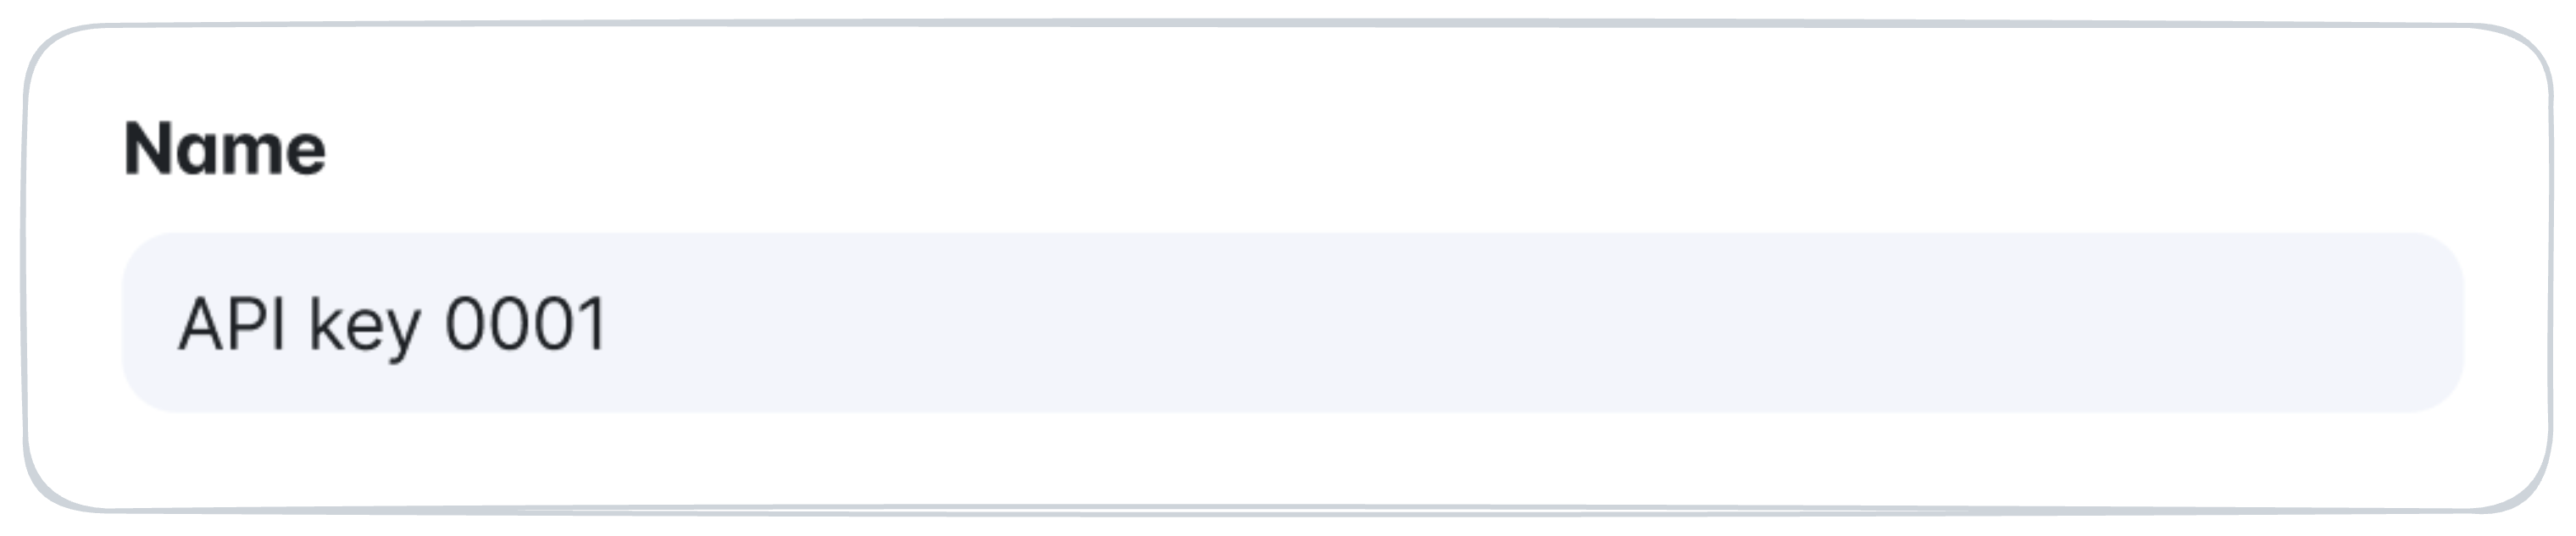
- Name: enter a name for your API key.
- Validity period: select your key's validity timeframe (30 days / 6 months / 1 year).

- In the Save API key dialog, copy your API key for further usage.
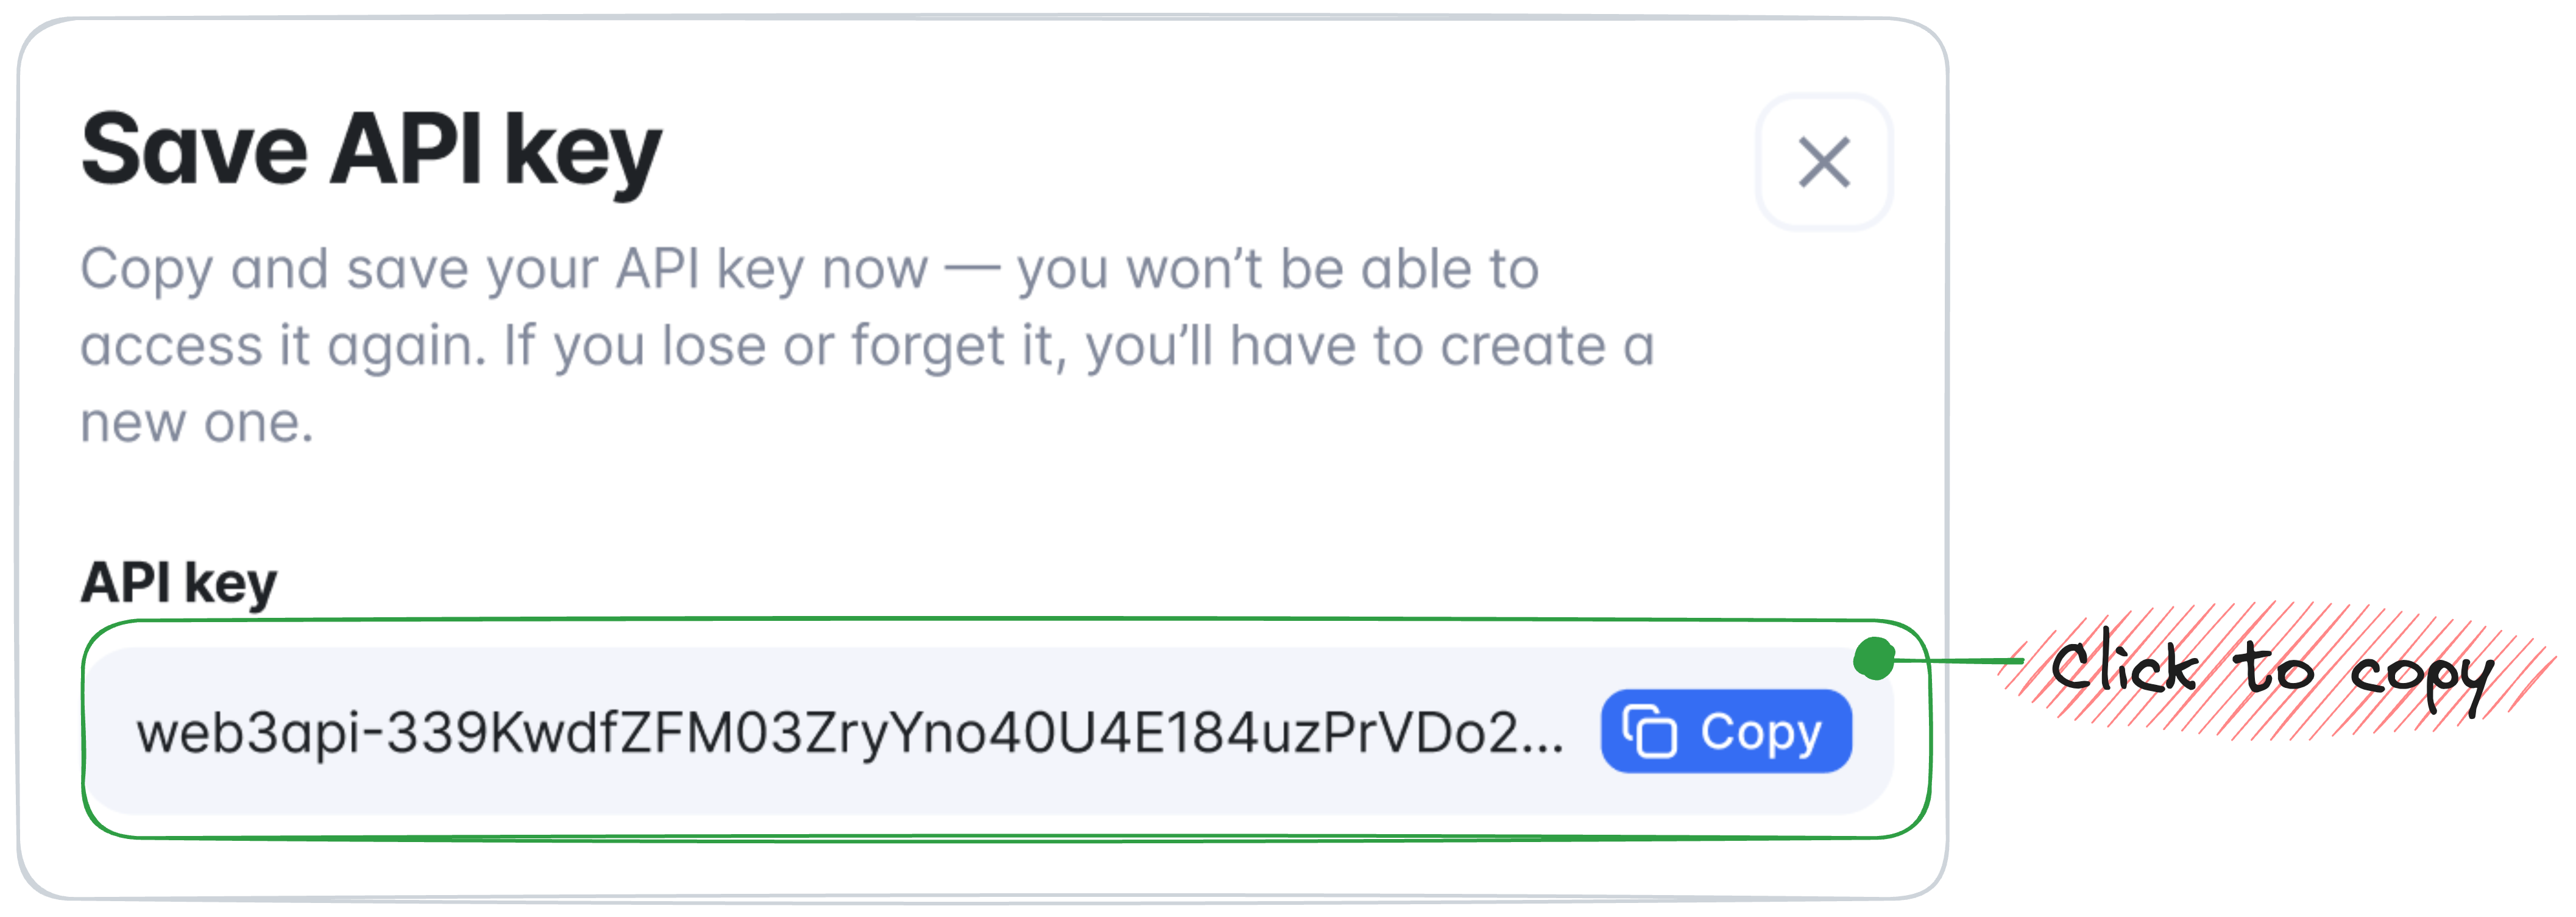
Congrats — you've just created and copied an API Key for Swagger interaction.
Swagger UI interaction
Prerequisites:
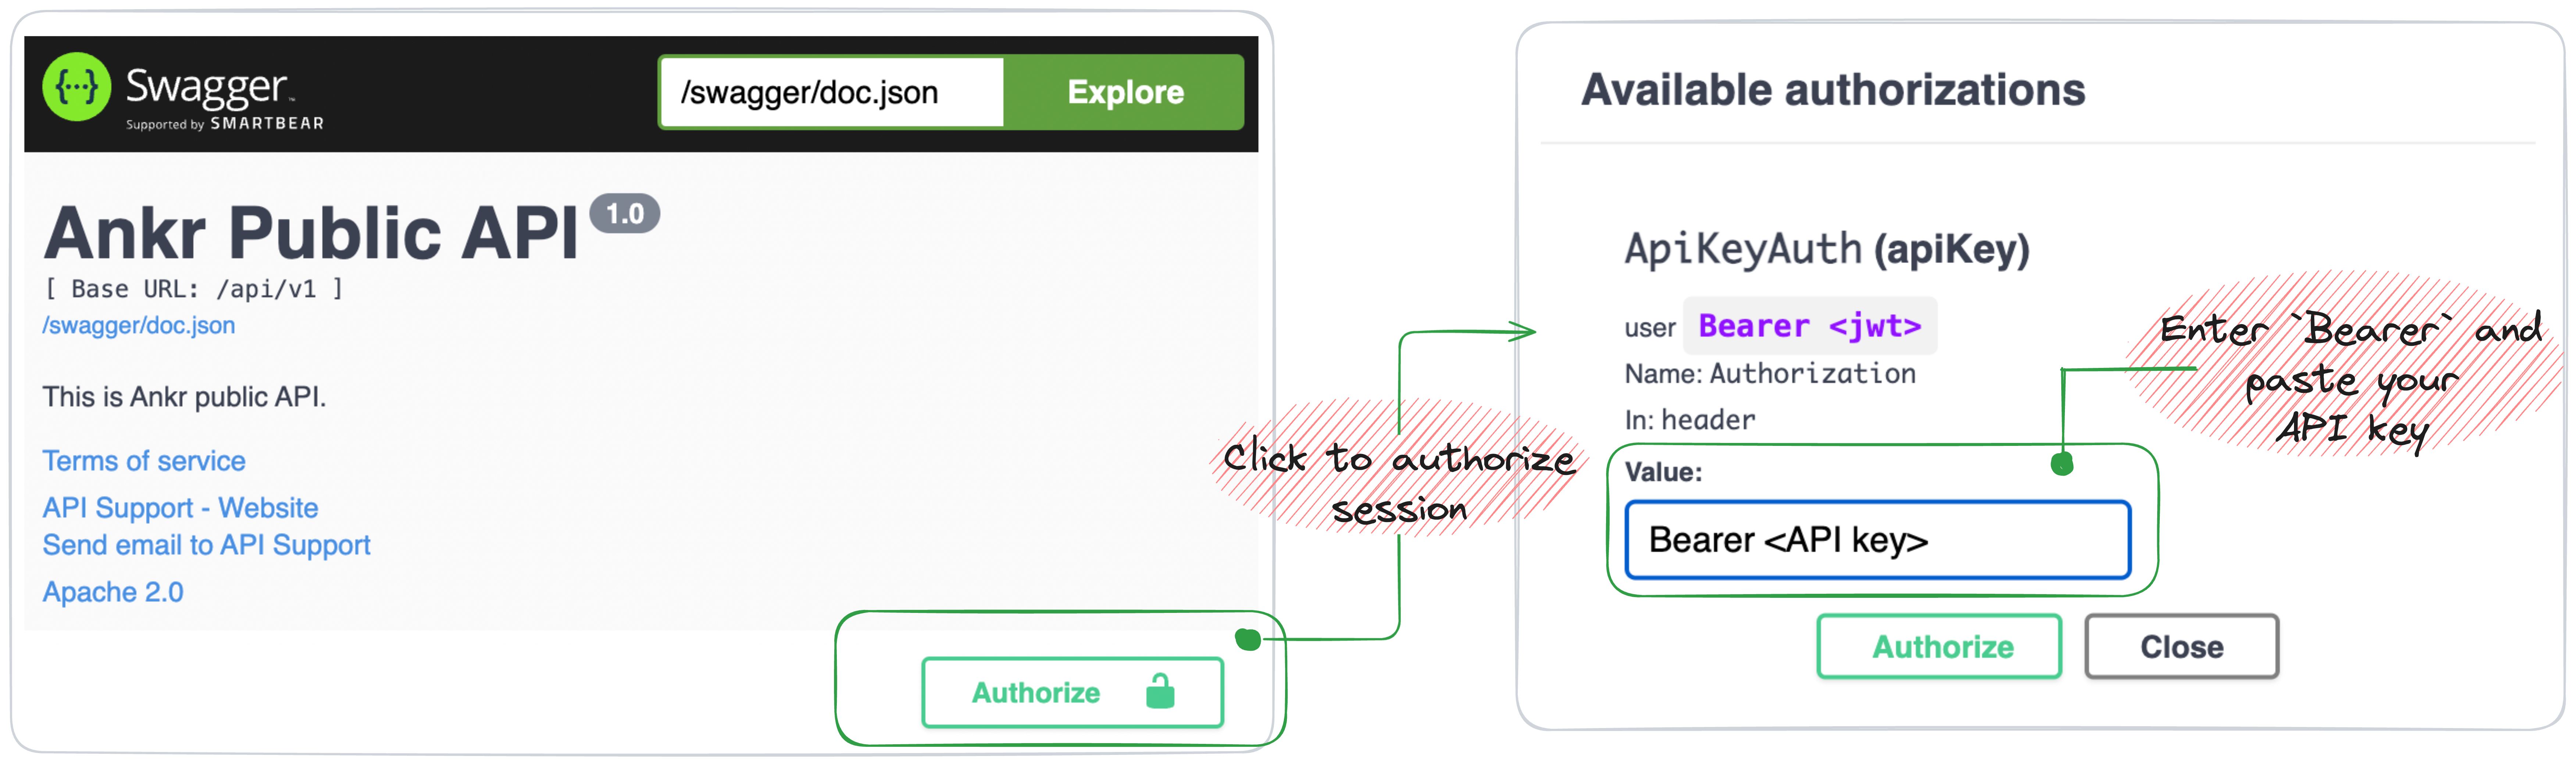
To authorize your Swagger UI session, follow these steps:
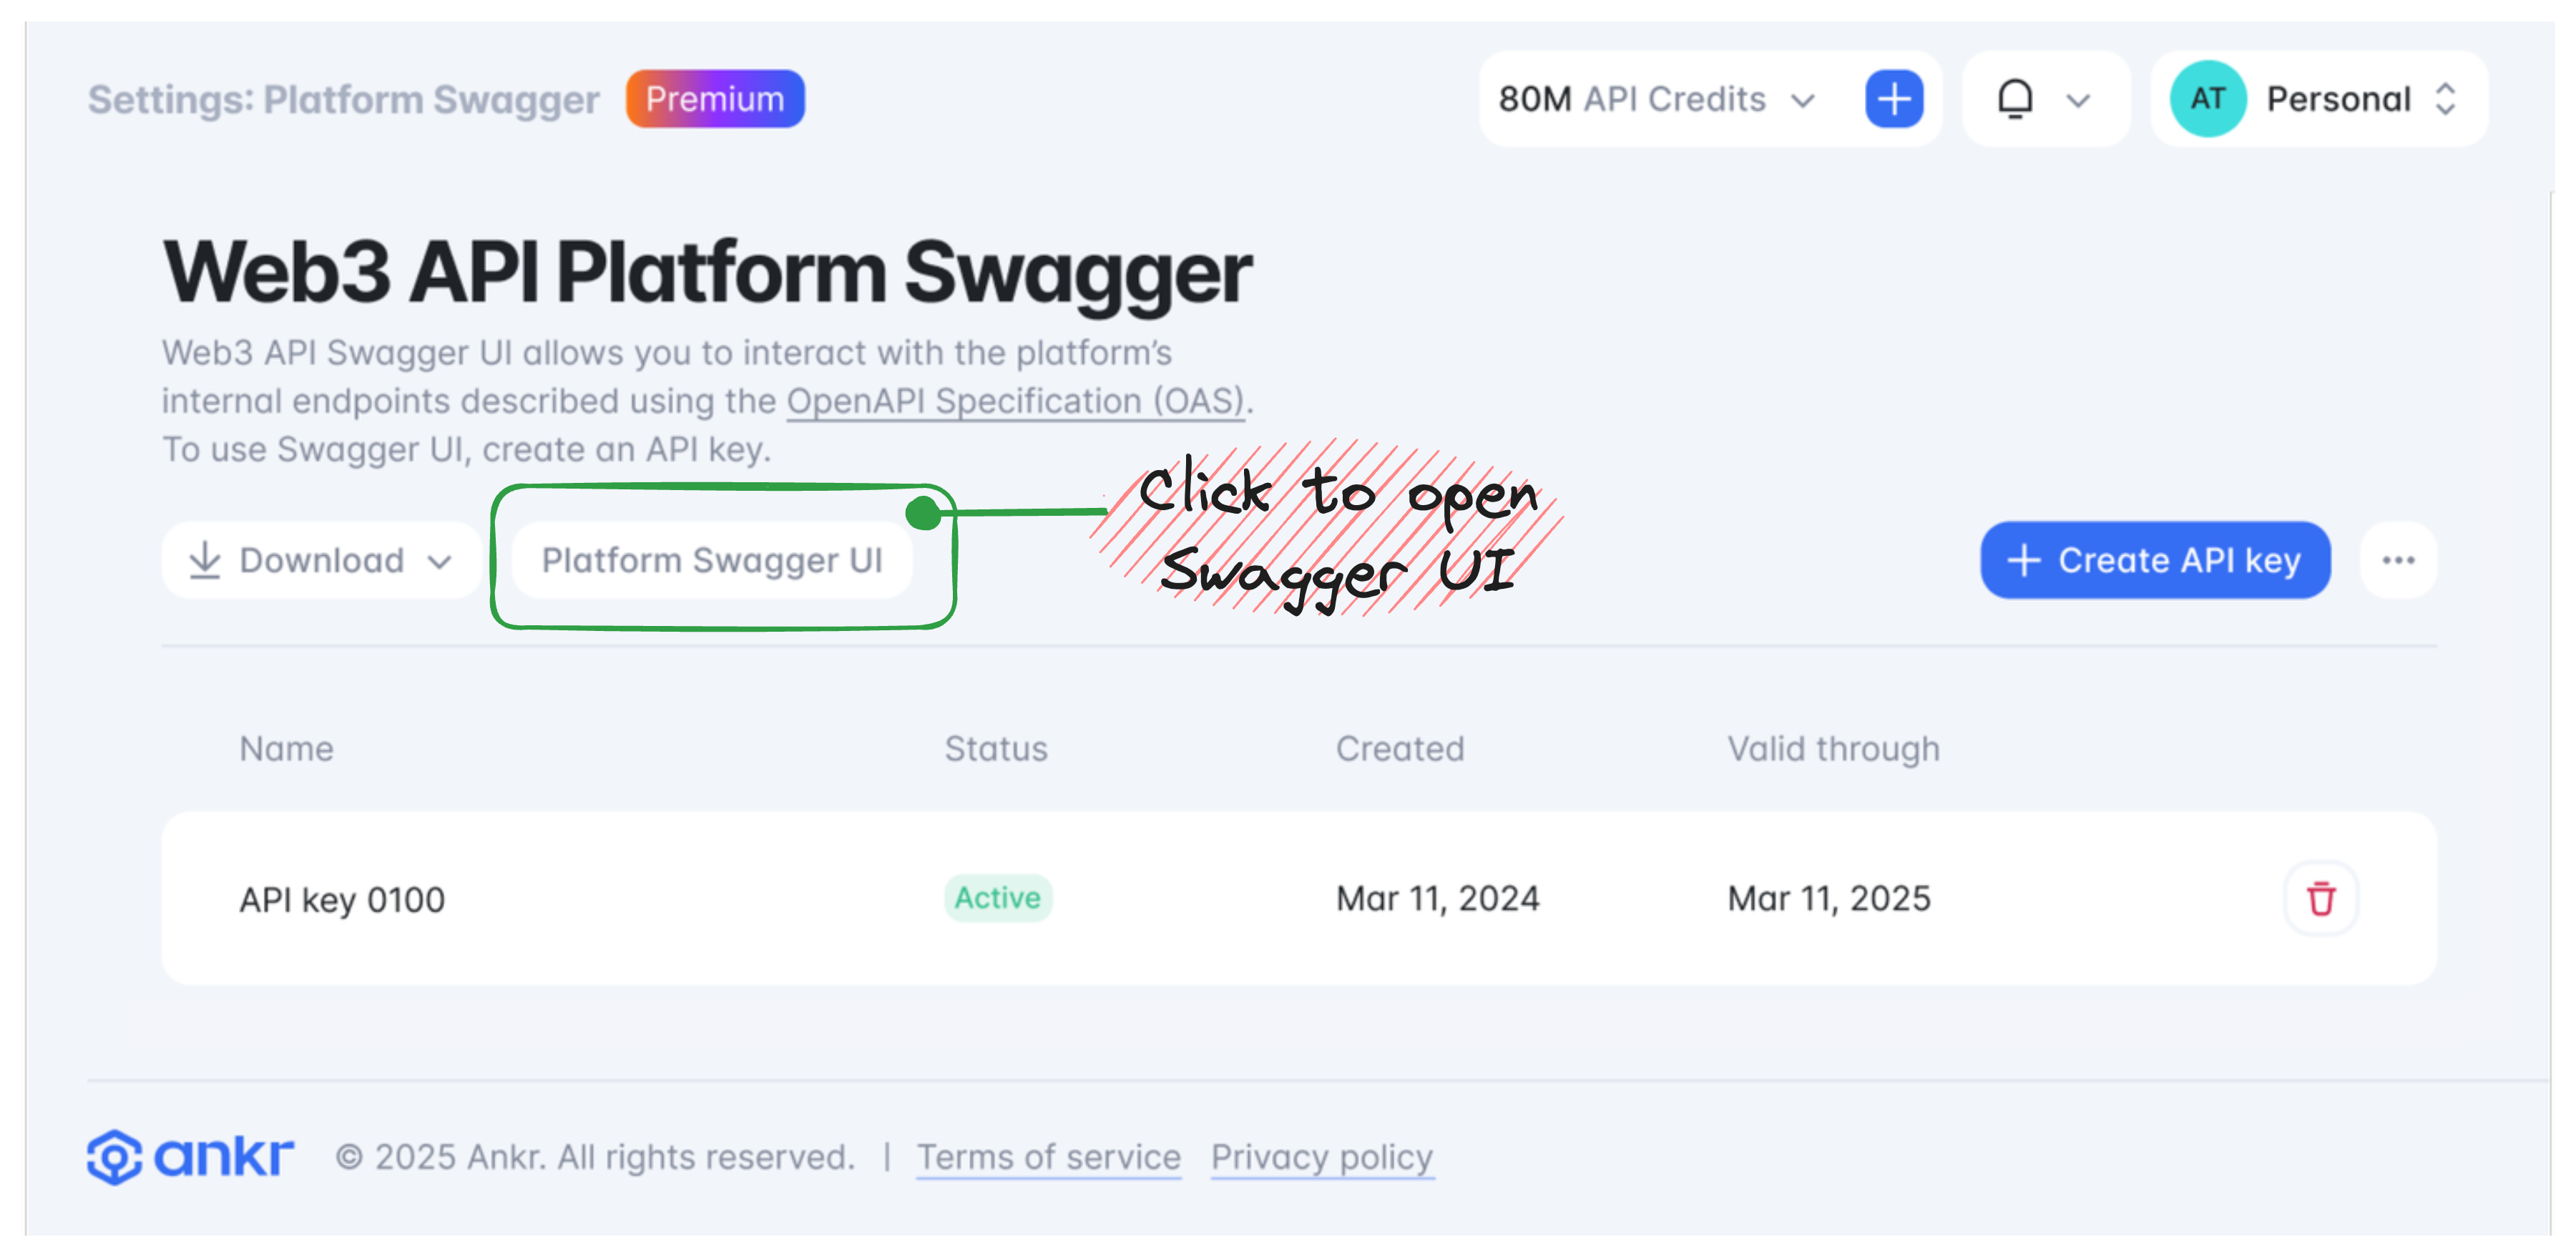
- In the Web3 API Platform Swagger pane, click Platform Swagger UI to open it in a new tab.
- In the Swagger UI opened, click Authorize; in the Value field, enter
Bearer, paste in your copied API key preceded with a space, and then click Authorize once again.
Congrats — you've just authorized your Swagger session; now you're all set to interact with our platform endpoints.