Projects
Available for both Freemium and Premium users.
Introduction
The Projects feature aims to provide a business that manages multiple projects — dApps/platforms (powered with Ankr's blockchain interaction) — with the means to organize, monitor, control, and secure the endpoints used to power each of those projects.
The Projects feature is built to help you with the following:
- Organize endpoints: Now you can organize your endpoints by their specific sphere of usage — by project.
- Monitor projects: Our Statistics now serves to build your insights around a particular project's scope of work, equipping your business with proactive tools for decision-making.
- Freeze projects: You now have a single-click ability to put your projects on/off handbrake — to stop/start powering your projects with our endpoints.
- Safeguard endpoints: We have your project's back covered with the whitelist security mechanisms safeguarding your endpoints from abuse and enabling you to define domains, IPs, or smart contracts allowed for endpoints communication.
In simple terms, each new project provides a new unique token to be used in your private endpoints. Your projects differ from each other based on that token. The endpoints with the same token power a single project. And you can view each project's metrics in the Statistics pane.
In essence, the endpoint for the Freemium/Premium user can be schematically described by the following formula:
Endpoint=Project (API key)+Network
Usage
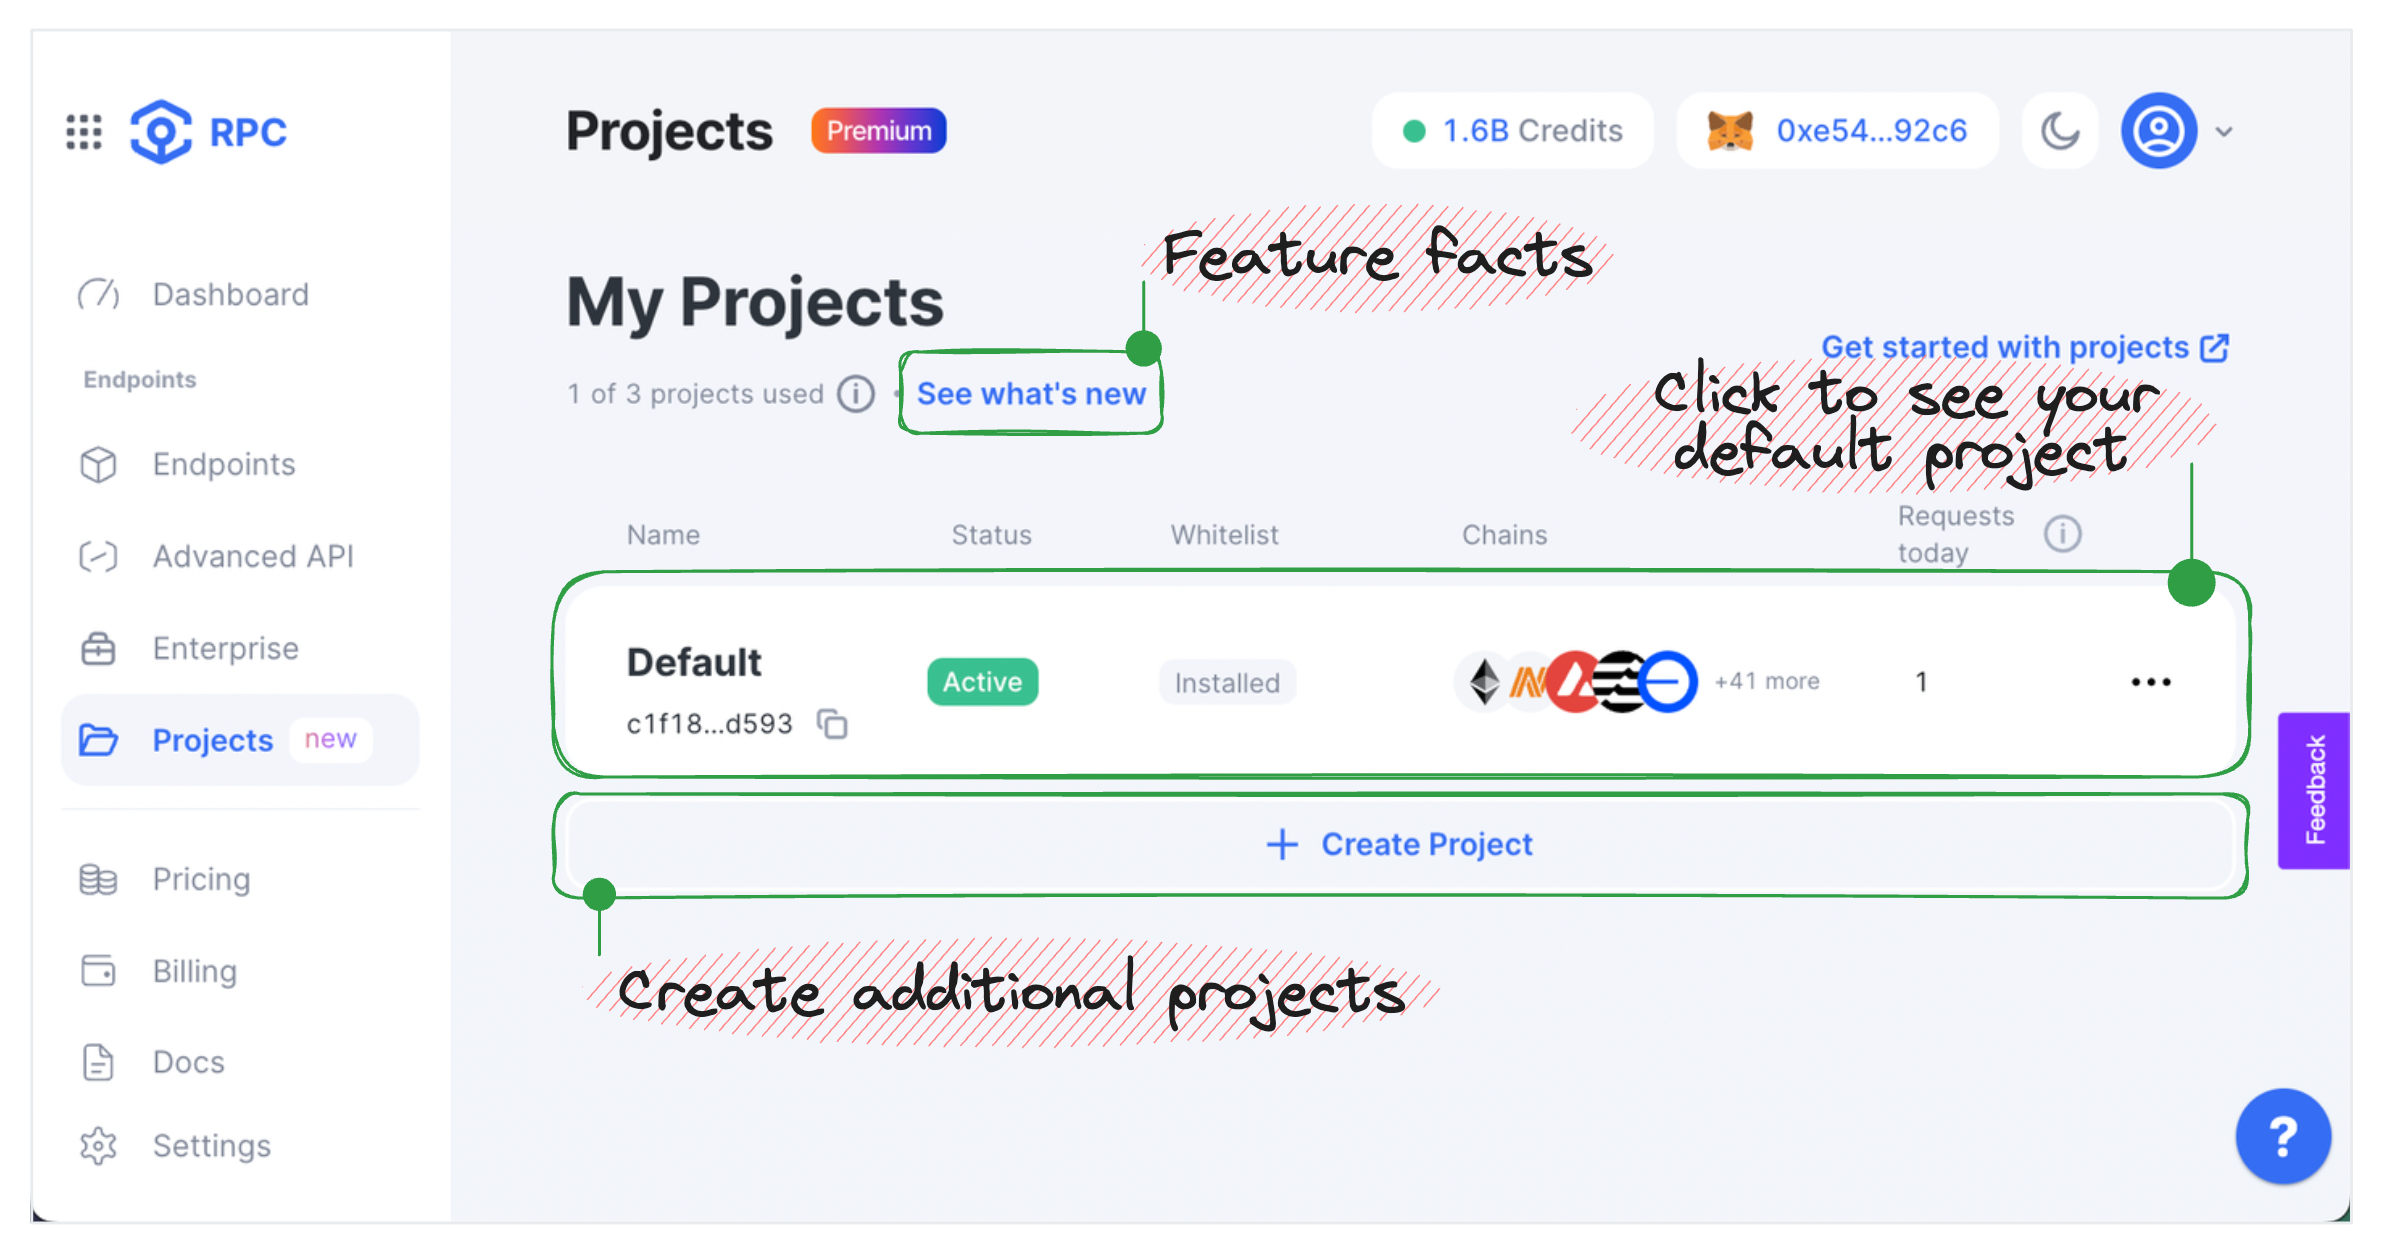
The Default project contains all your previously configured data — chains, networks, and transactions history. On top of that, now you can configure additional projects and secure your endpoints with multiple whitelist options.
Create project
Major parts
Project creation consists of the following parts:
General info—>Chains—>Endpoints whitelist
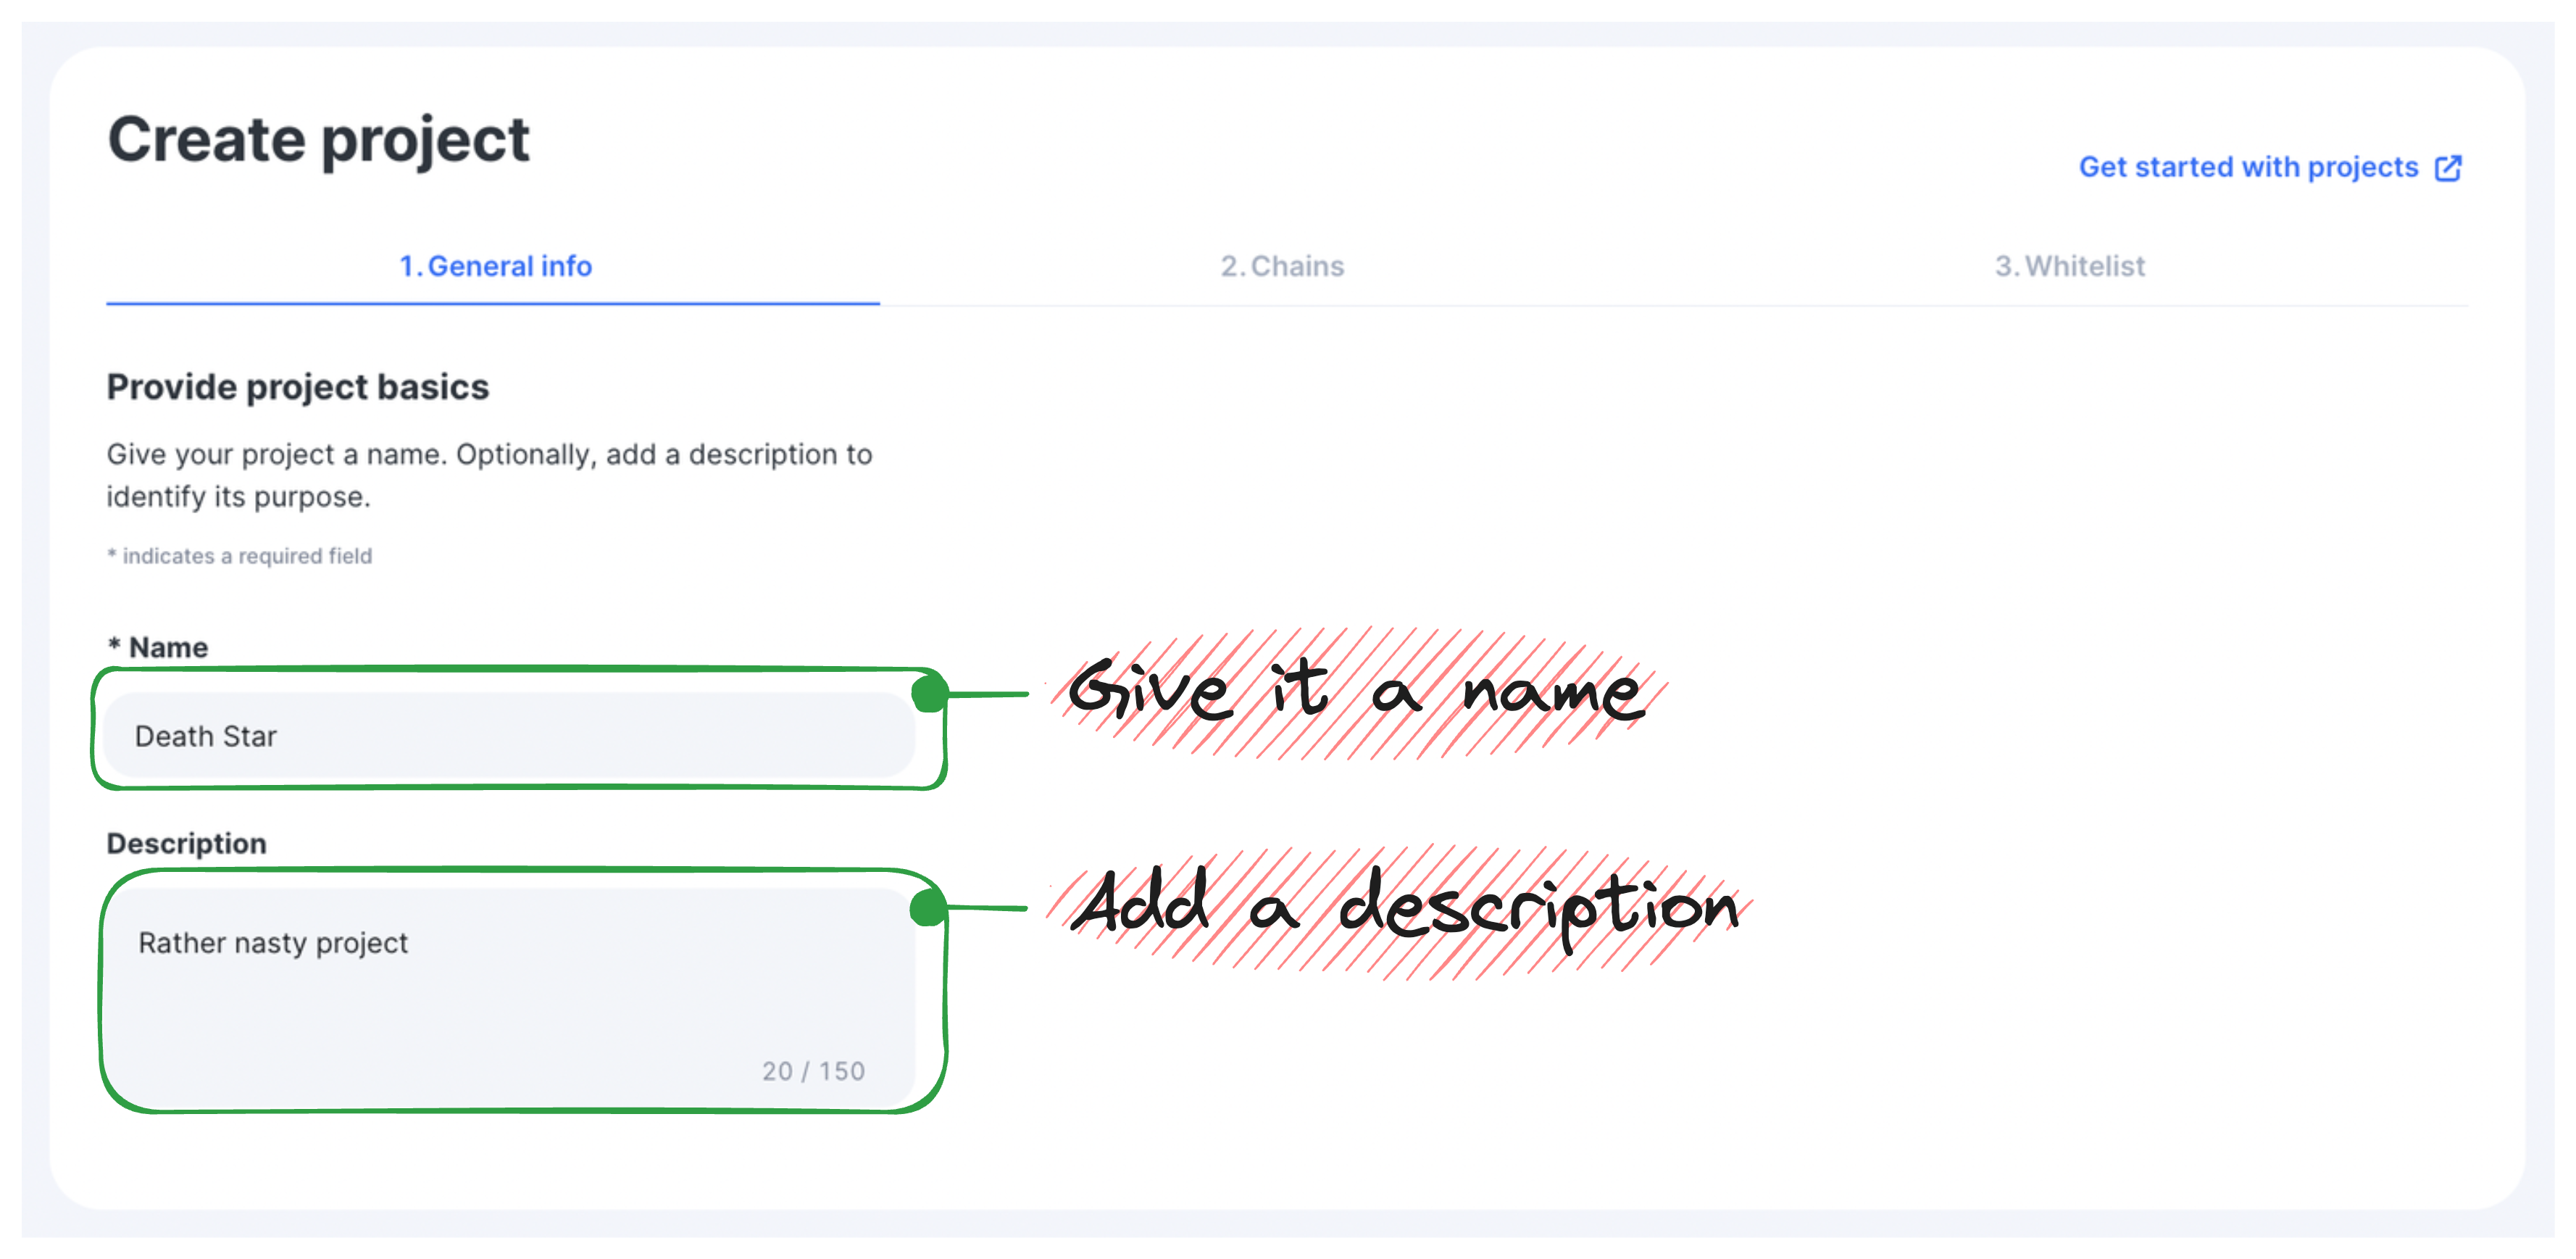
General info: The project’s basic details such as name and description, helping you define its scope of work. For example, if the project’s endpoints are used for a specific application, naming the project accordingly will make it easier to distinguish its stats and spending later.Chains: The chains and networks you'd like to interact with in terms of this project. You won't be able to interact with a particular network unless it's added into your project.Endpoints whitelist: A safeguard that prevents your endpoints from unauthorized use. Ideal for cases when you already know the domains, IPs, or smart contracts that will interact with your endpoints. Must be configured individually for each project's endpoint.
Creation flow
To create a new project, follow these steps:
- In Navigation, click Projects to open the corresponding pane.
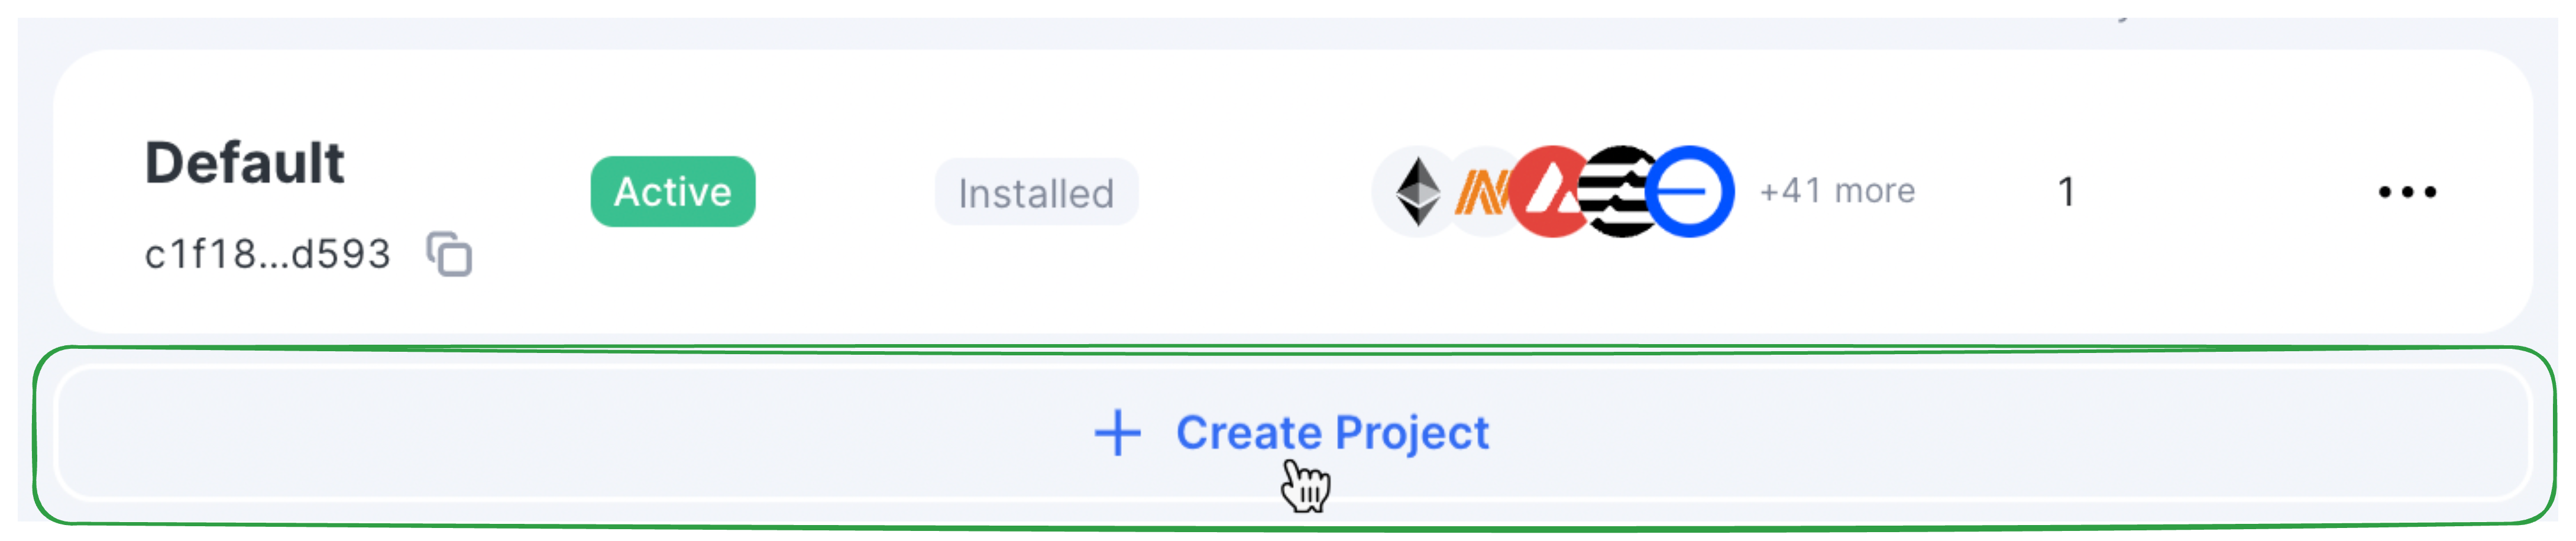
- In the Projects pane, click + Create Project, and go through the steps to configure it:
- General info — enter a name (required) and give your project a description (optional) to identify its purpose; click Next.
- Chains — select chains and networks your project requires; click Next.

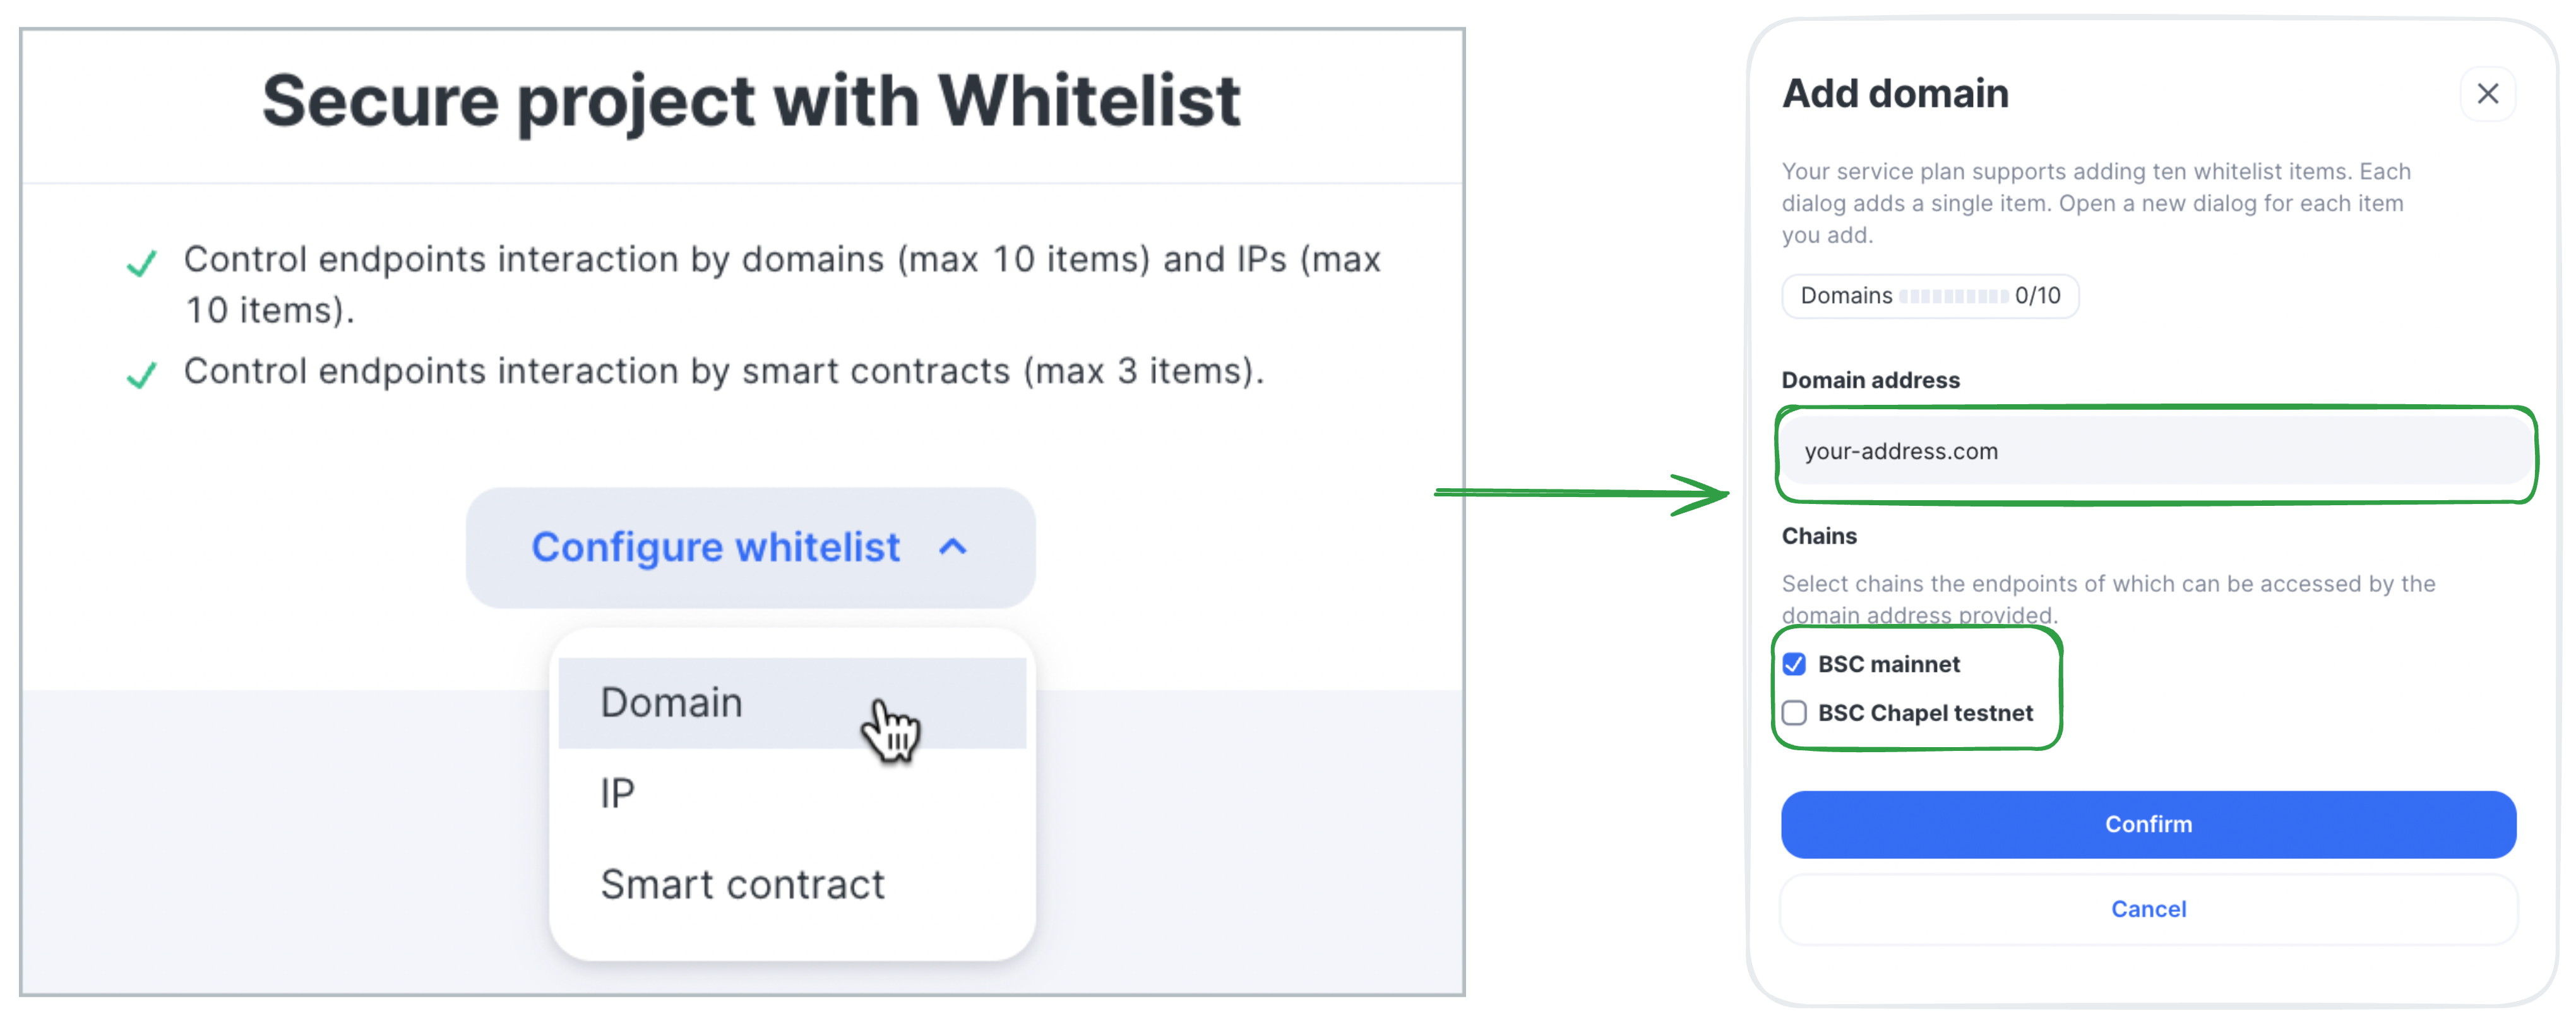
- Endpoints whitelist — click Configure > Add and select whitelist option (Domain/IP/Smart contract), enter the Domain/IP/Smart contract address, select chains the endpoints of which can be accessed by the address provided, then click Confirm, close the side menu, and click Next; this step can be configured right away or later (Save without configuring).
Congrats — you've just configured and created a new project.
View project
To view a project, click the corresponding project's tile.
Each project consists of four main blocks:
General info—Total requests (1h/24h)—Whitelist—Endpoints
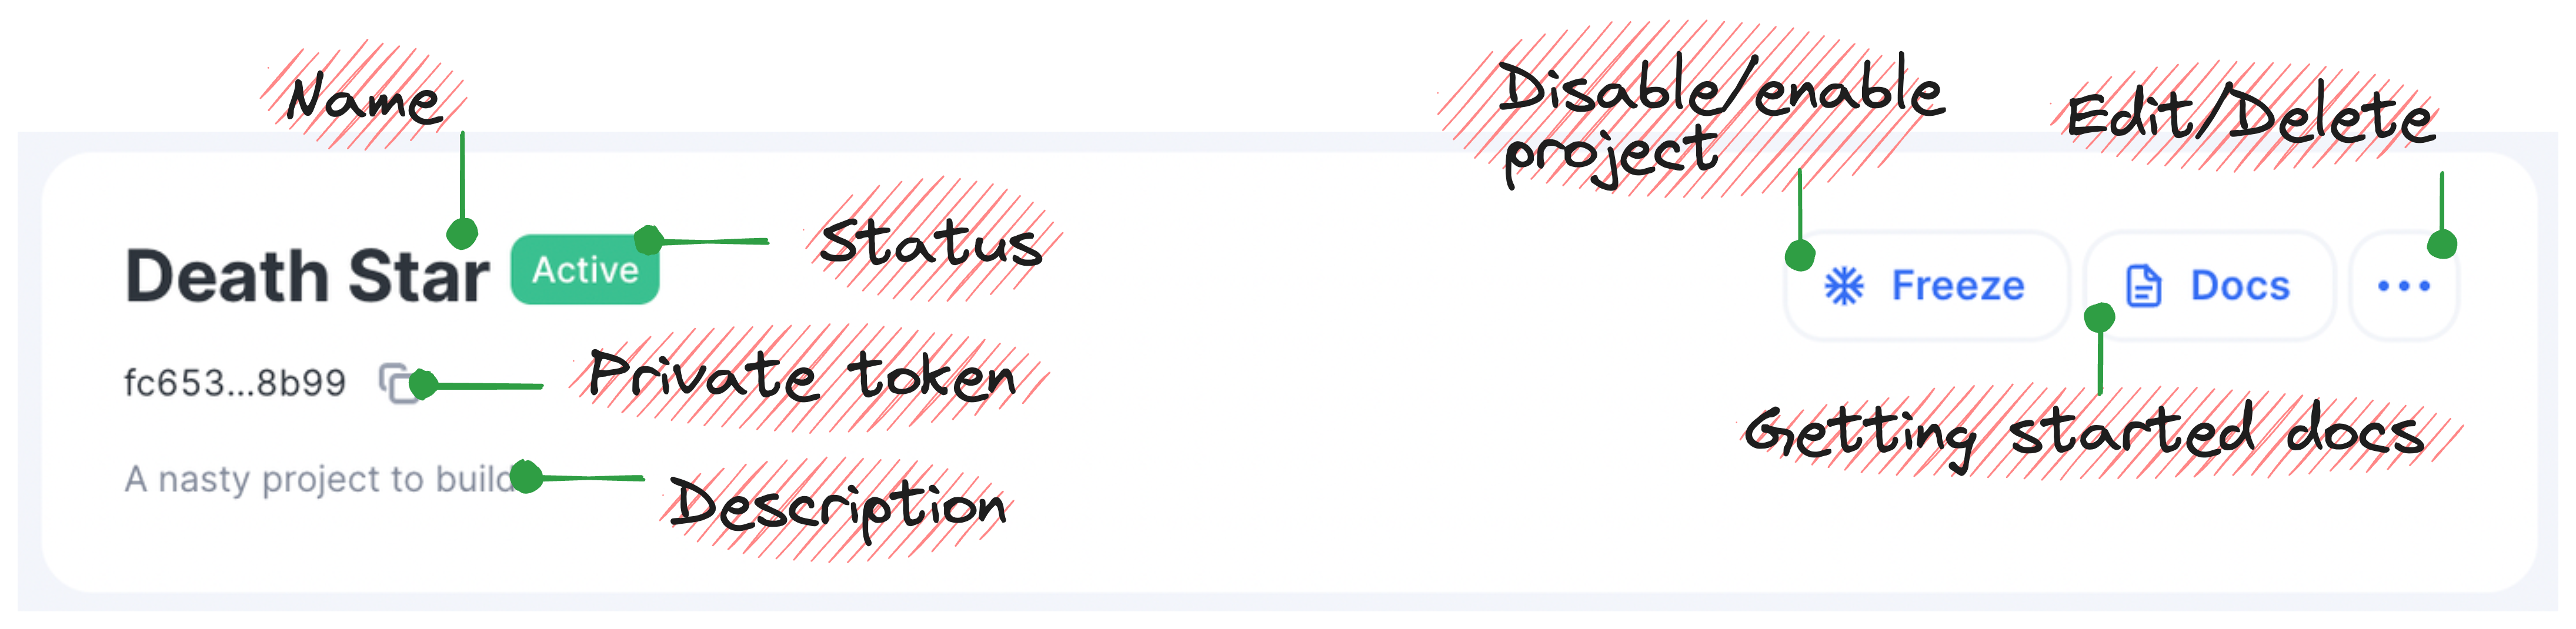
General info
The General info block contains your private token, buttons to enable/disable the project's endpoints, and the button for project deletion.
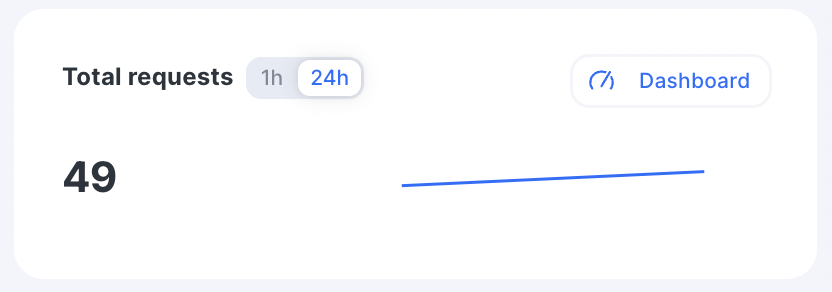
Total requests
The Total requests block shows total requests for the past 1h or 24h and contains the button that moves you to a larger statistics dashboard.
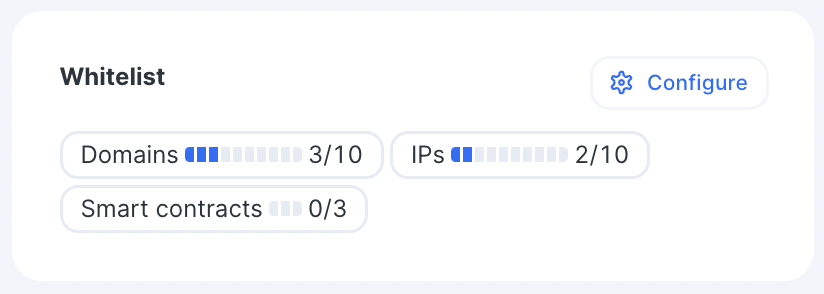
Whitelist
The Whitelist block contains the button to create whitelists, and shows the number of configured and available whitelist entities.
Endpoints
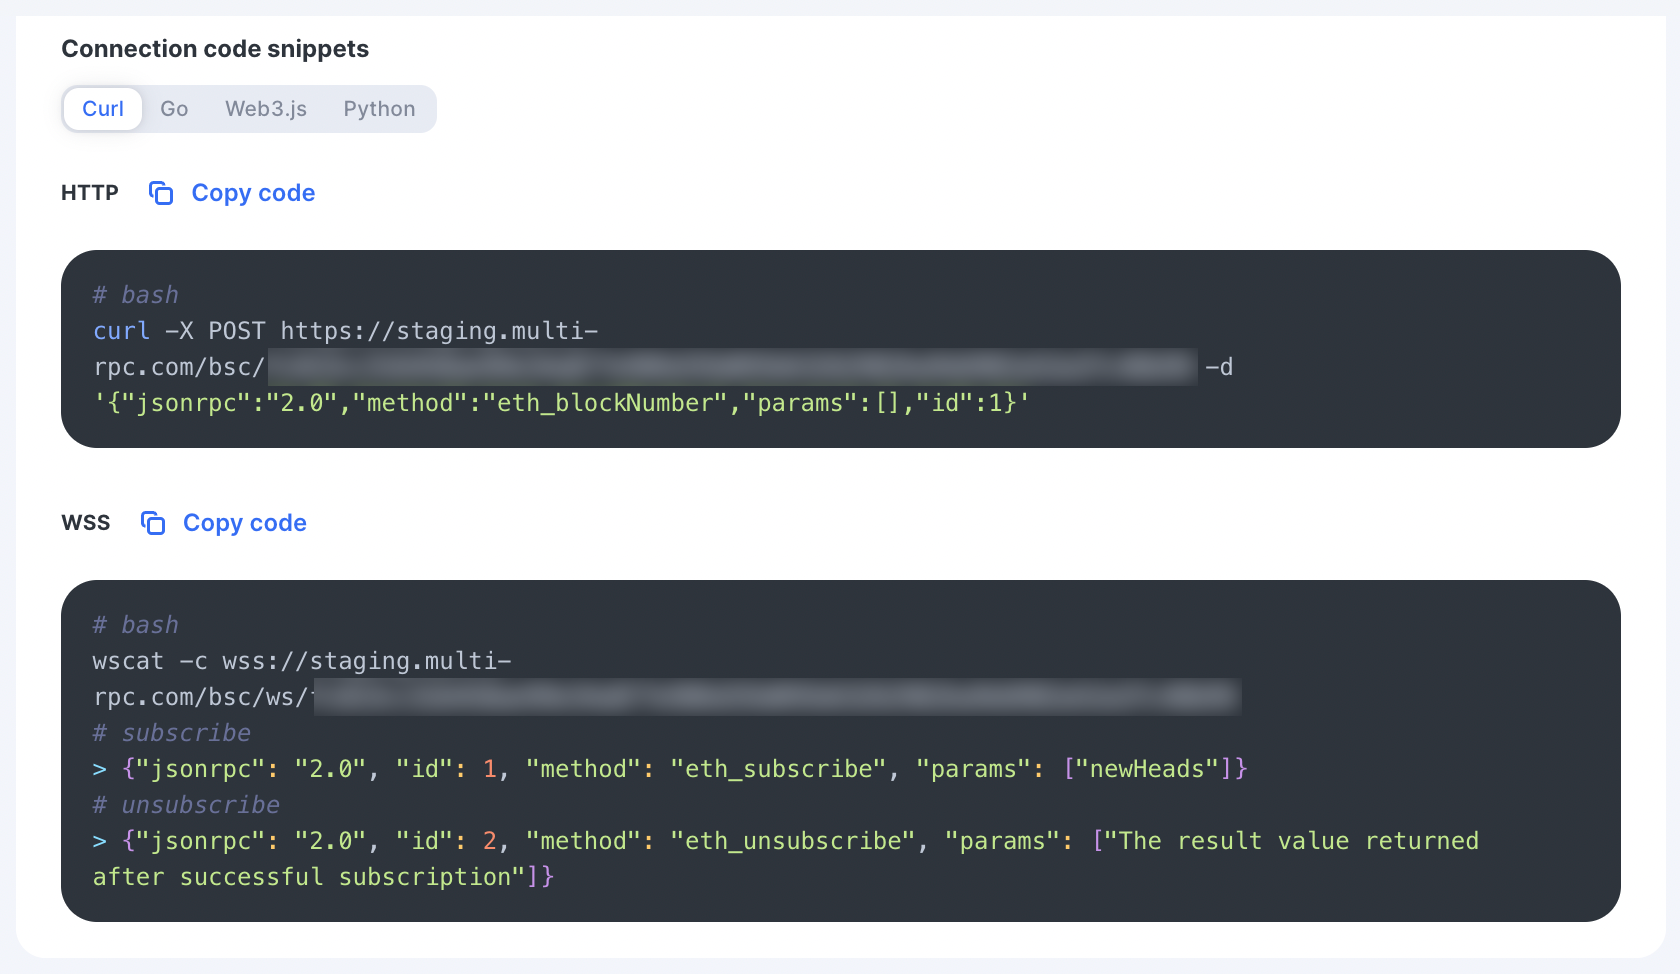
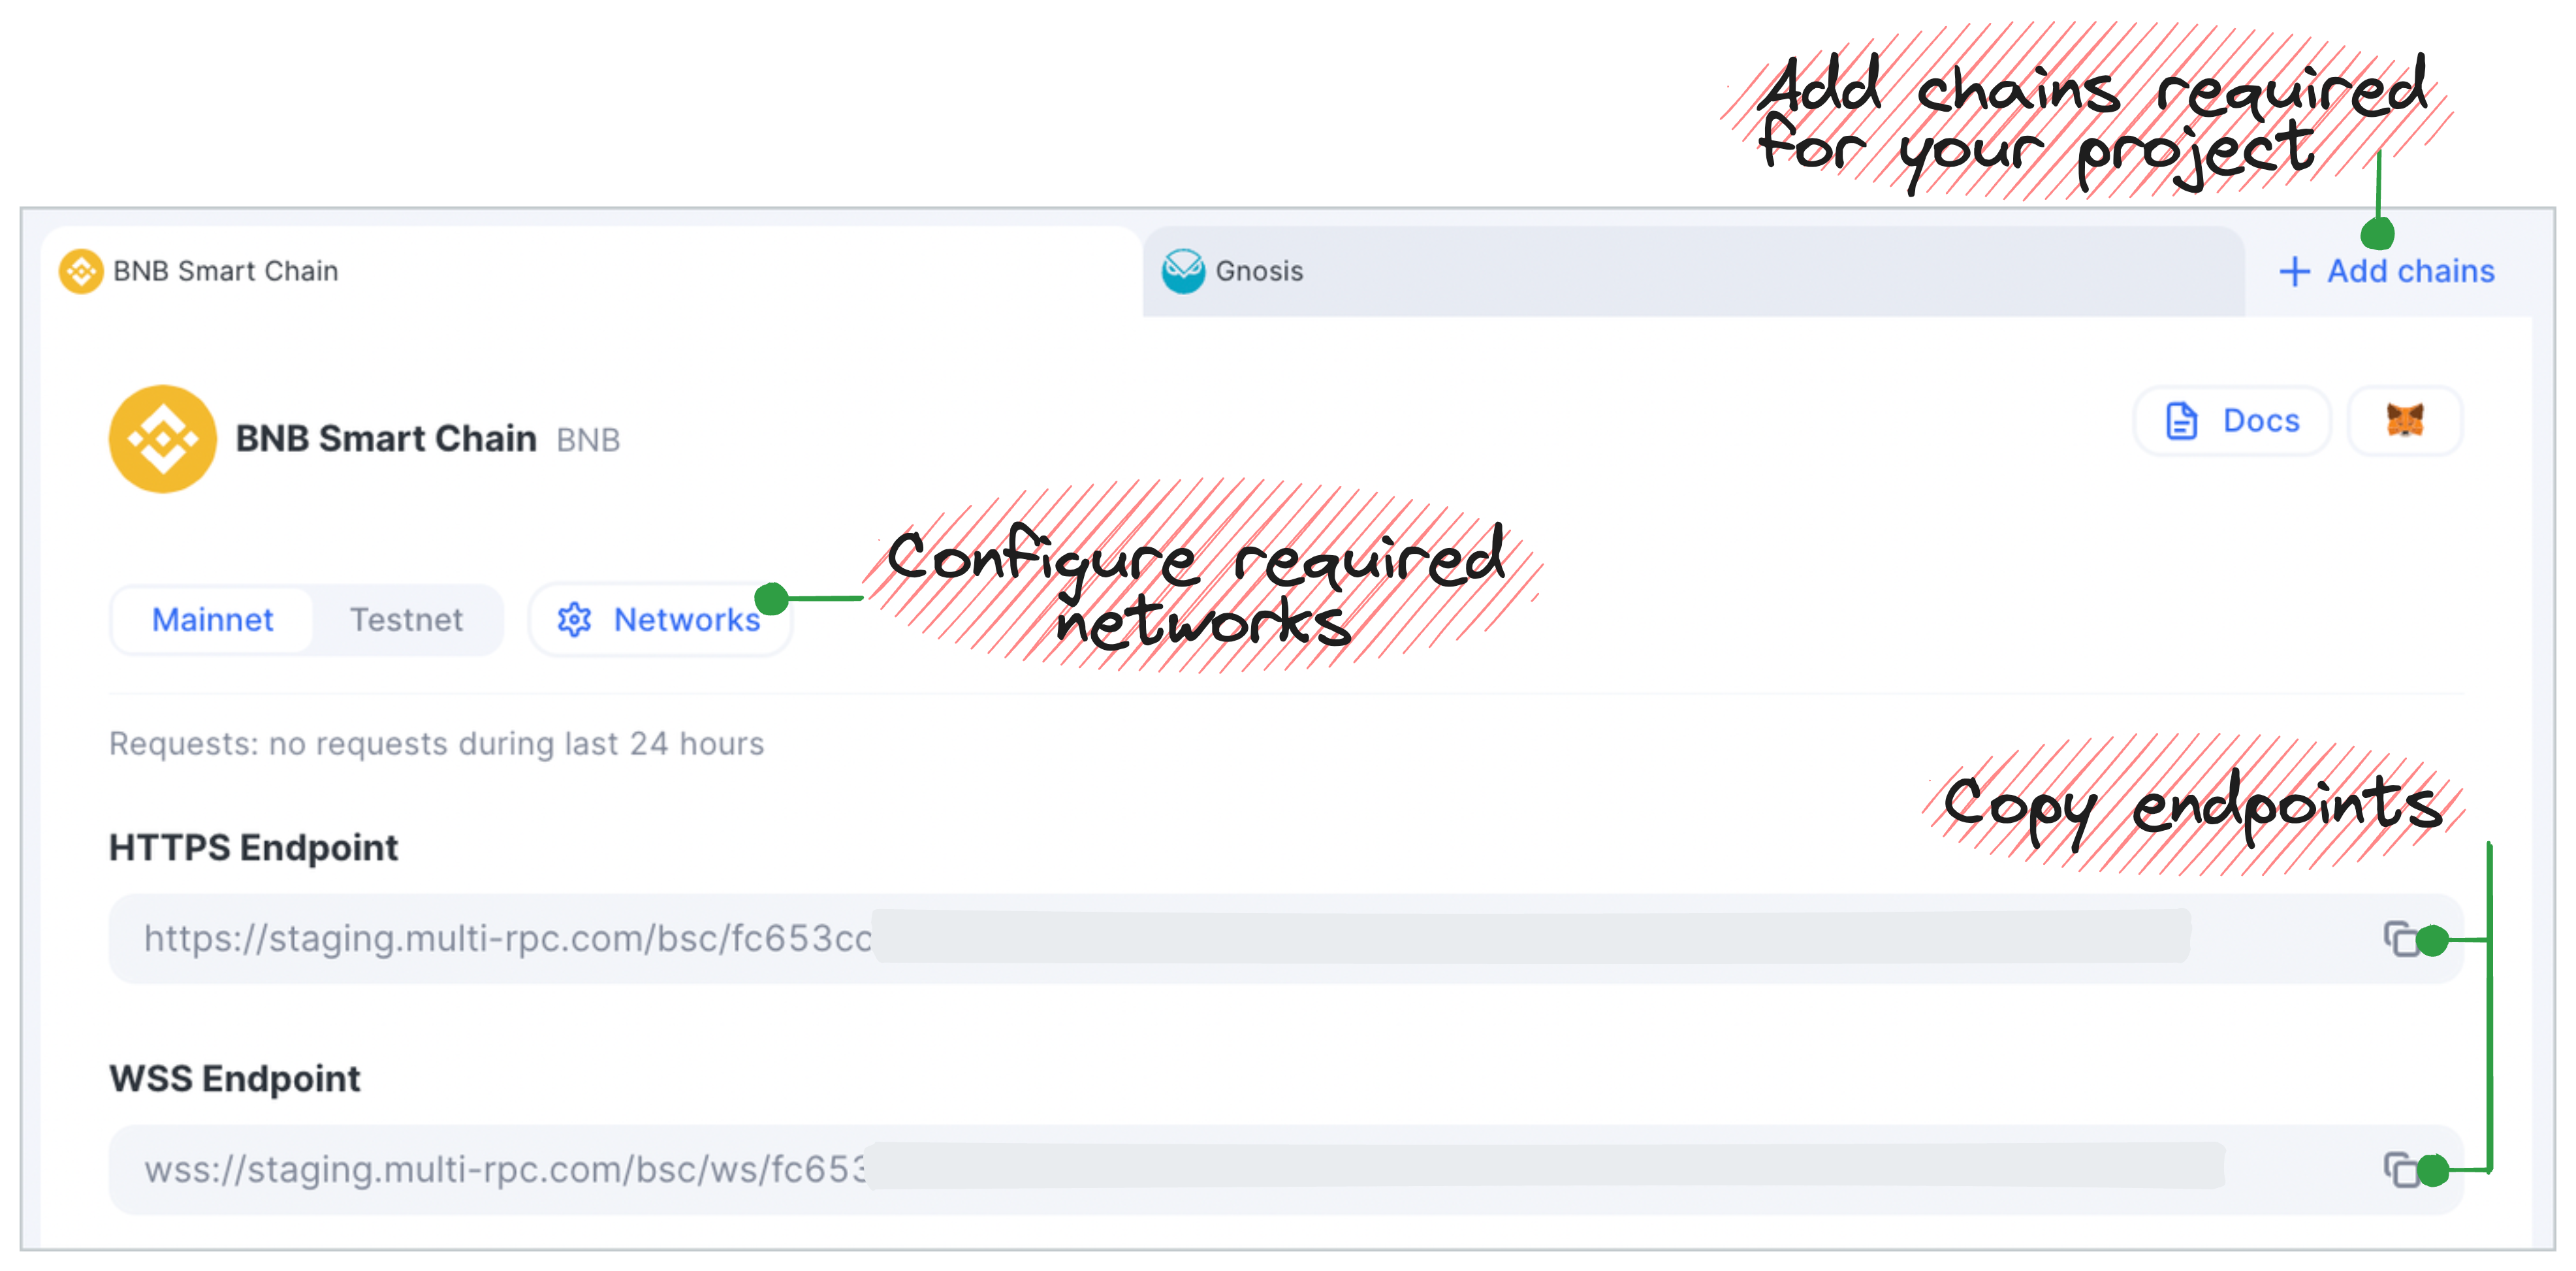
The Endpoints block helps you add chains and networks required for your project, access HTTPS and WSS endpoints.
And copy connection code snippets.